How to Convert DWG/DXF Files to GeoTIFF
Many Propeller users have knowledge of surveying software and supporting programs that’s way above average. But even if you don’t, you’ve likely done some kind of manual data conversion with your drone data at one point or another.

To help with better understanding these processes, Propeller is putting together a few how-to write-ups on our most popular data queries.
Today, we’ll be covering how to convert DWG or DXF files to geoTIFF format using Global Mapper.
Download the necessary software
Before we start, make sure you have Global Mapper installed on your computer. (If you don’t have it, you can purchase the software from their website.)
Start with your DWG/DXF as a layer
Once you have the software installed and ready to go, launch the program. Then import your DWG/DXF as a layer, as shown below.

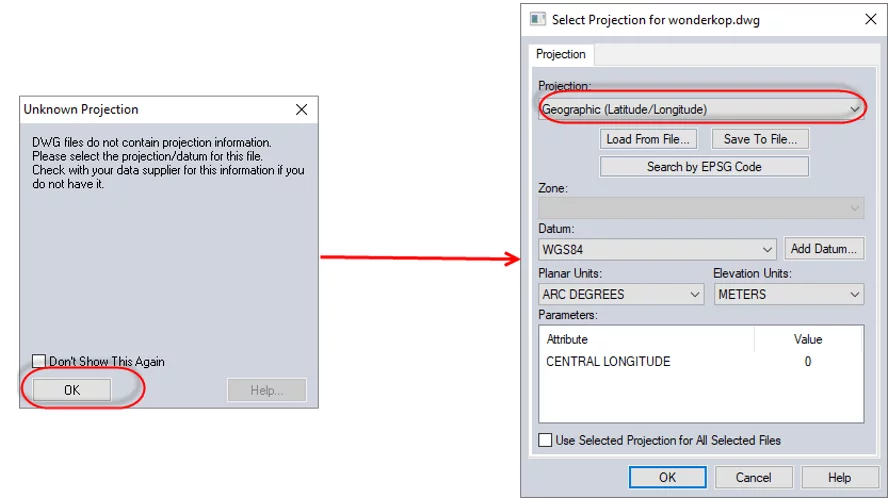
Note the original coordinate system of your file
After you’ve got that file imported, the next step involves designating the projected coordinate system your file is in. Make sure you have this info on-hand during this process, so it goes as smoothly as possible.
When the program prompts, select the correct system for your data.
Once you’ve chosen, navigate to the top menu bar. Here, you’ll choose Analysis, then Create Elevation Grid from 3D Vector Data.
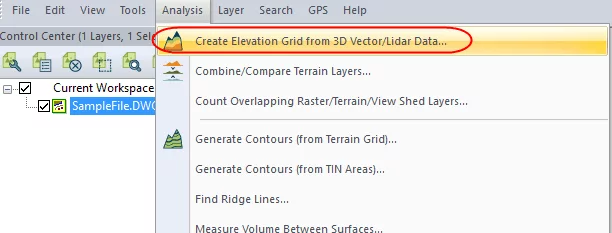
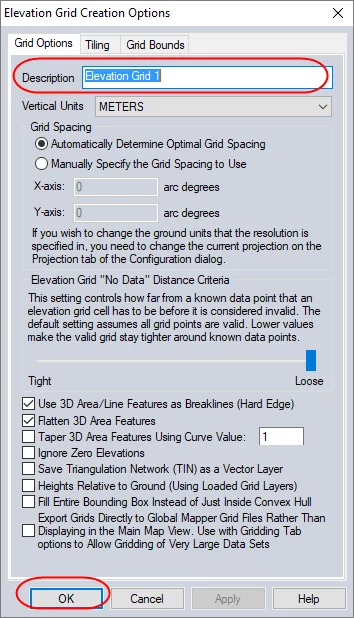
After choosing that option, enter an appropriate description under the Grid Options tab and hit OK. This is defaulted to “Elevation Grid,” so choose something descriptive for your purposes.
Exporting your file into geoTIFF
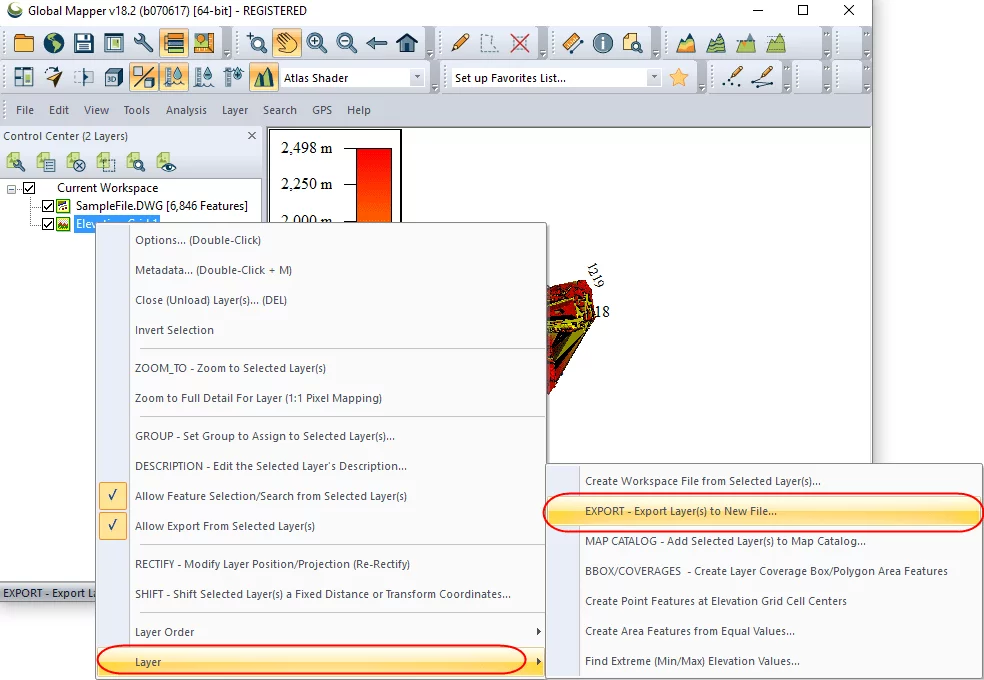
Now comes the actual exporting. Right-click on the layer that was created, then export it as a geoTIFF by navigating to Layer > EXPORT – Export Layer(s) to New File…. This will bring you to a dropdown menu on selecting the export format. Pick “GeoTIFF” from menu. Click OK.

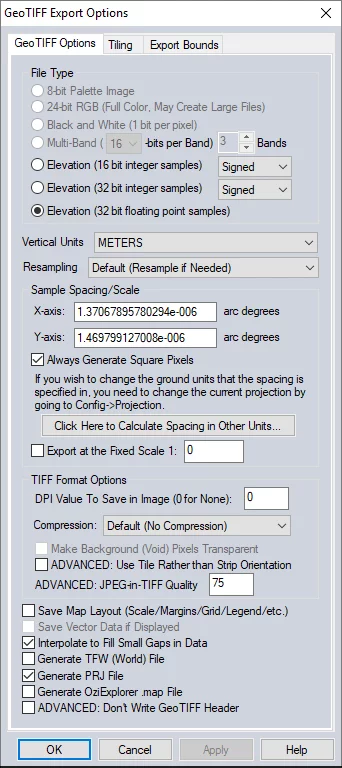
Before the conversion is finalized, you need to ensure the output file is type is a 32 bit signed float. Under GeoTIFF Export Options (near the top of the options window), choose the “Elevation (32 bit floating point samples)” option. Click OK.
GeoTIFF conversion complete
The resulting file is a DEM in geoTIFF format. This can be uploaded for processing into Propeller like any other terrain.
You might also like:
Inside Look: How Propeller’s Data QA Works
Five Ways to Use DXFs on a Worksite You Might Not Know About
Picking The Best Hardware and Software for Your Drone Program